
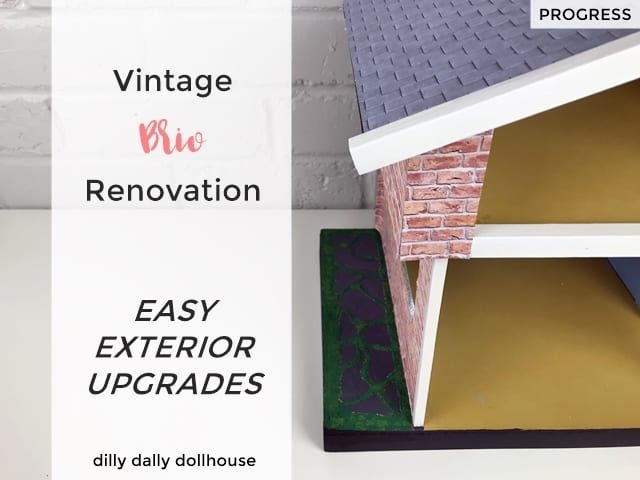
Continuing on the vintage Brio dollhouse renovation! As I said in the “before” post, I’d like to make this renovation relatively easy, so I looked into printables for upgrading the dollhouse exterior. Searching online, I stumbled into Textures.com and Sketchup Texture Club. Both sites offer freemium seamless/repeatable patterns of different types of materials. So you’ll find life-like roof patterns, wood flooring, tiles, stones, and so on. This is what I use for exterior surfaces–way easier than cutting out small pieces of materials and gluing them one by one.
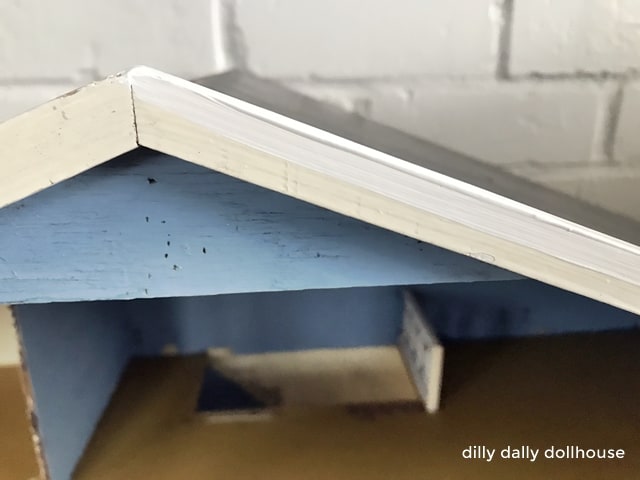
Painting the trims
The number one tip when it comes to renovating a dollhouse is to get all the painting done before installing wallpaper. It’s so much easier to cover up accidental paint marks with the wallpaper, than to try to remove the paint from paper.
To freshen up the trims that have yellowed from age, I brushed on a coat of FolkArt titanium white acrylic paint mixed with a tiny bit of Liquitex Flow-Aid medium, which helps to make the brush strokes less visible. I didn’t do two coats because this is the brightest white by FolkArt, and stark white might look too harsh. You see here just one coat already makes a difference.
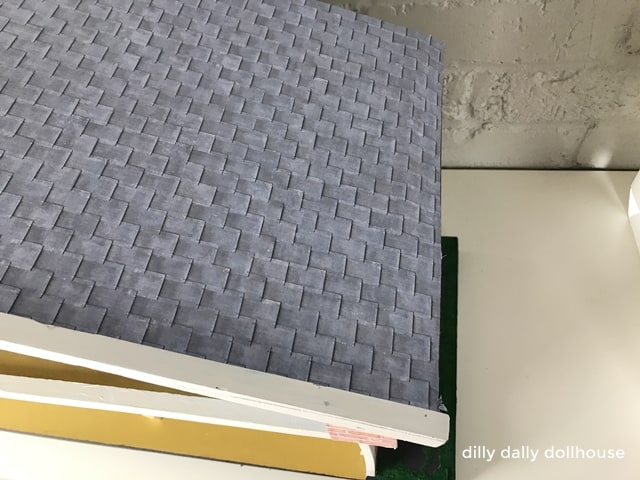
Easy dollhouse roofing
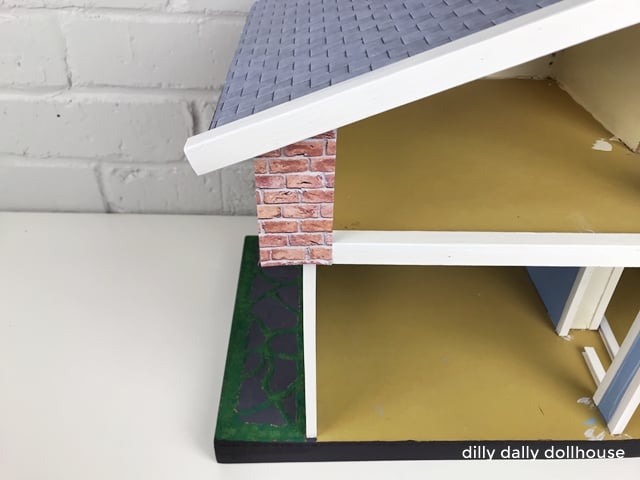
For the roof, I know I wanted to do some kind of gray slate. I got this slate texture from Textures.com, shrunk, and tiled the image in Inkscape to create a full page of repeating slate pattern. This is much easier than cutting out multiple strips of cardstock to simulate slate, like what I’ve done with my first renovation of a Lundby Gothenburg.
Also easy dollhouse siding
I’m not a big fan of light blue house exterior. So let’s go the complete opposite of the color spectrum with red bricks! I’ve used this brick pattern from Etsy on the Lundby Gothenburg renovation and loved the result, so I’m using it again here. I may end up redoing the siding with a different pattern though, because there are so many other options out there. What do you think would look good on this Brio?
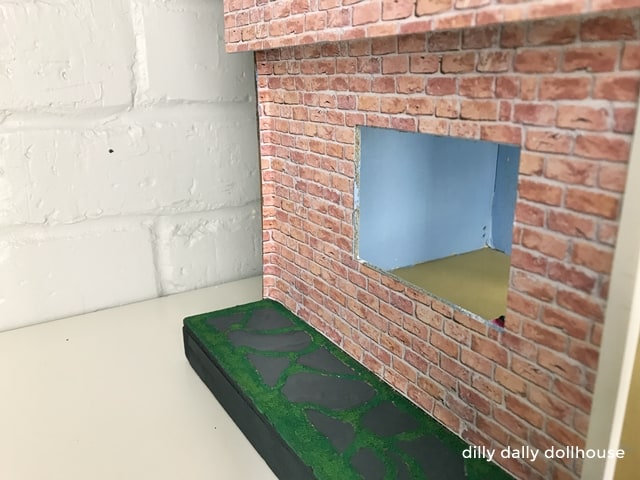
Removing the window trims first proved to be a good idea, as I didn’t have to be 100% accurate when cutting out the window opening on the paper siding.
Freshening up the yard and foundation
The teeny tiny side yards already have an existing texture, like poop-colored moss growing through infected-poop-colored ground, so I wanted to take advantage of it. I painted the ground dark gray so it looks like… ground. Or dirt, soil… you get the idea. It’s not a specific shade of gray, just whatever matte black with a little bit of white mixed it in. The “moss” is painted Americana holly green and layered with FolkArt yellow ochre to add some dimension.
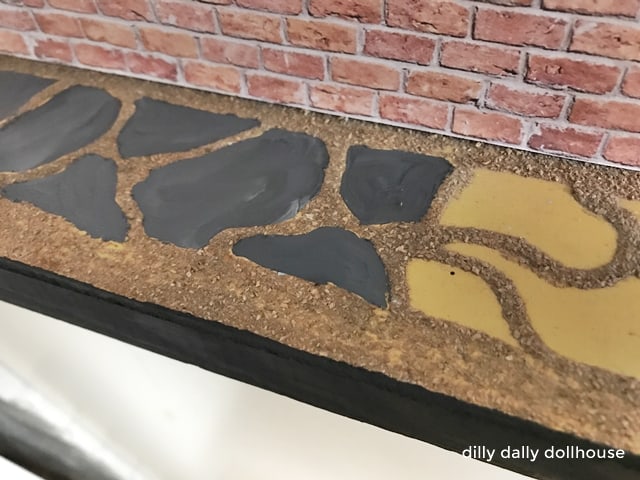
I’m no artist but I’d say it’s better than before. It looks like flagstone pavers with moss growing in between.
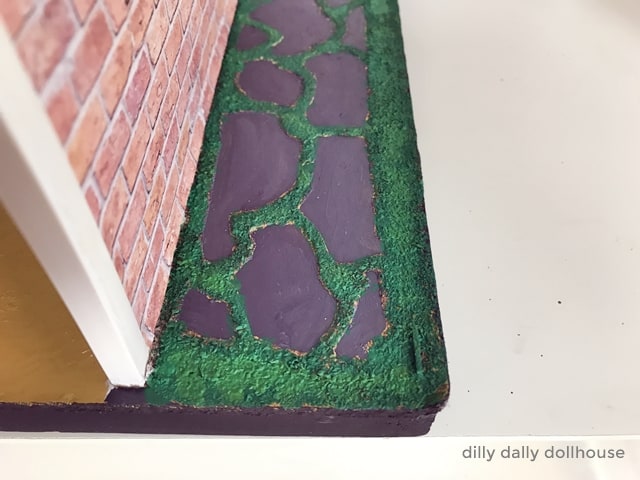
The foundation I simply painted matte black.
By the way, the best glue for applying your printables to the dollhouse is Grandma Stover’s. Aleene’s is great for millions of things, but when it comes to attaching paper to flat surfaces without the paper buckling, Grandma Stover wins. You can thank me later 😁
Next up, let’s go inside the house!
Dollhouse renovations are my favorite. A lot can be done with its exterior, and it gets exciting. I am looking forward to seeing changes in this exterior.