
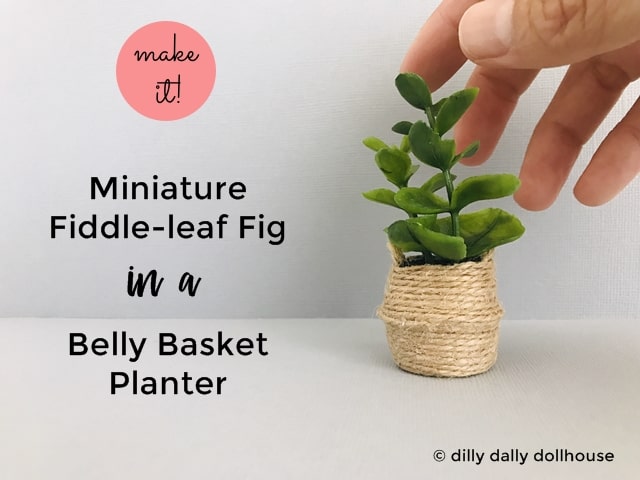
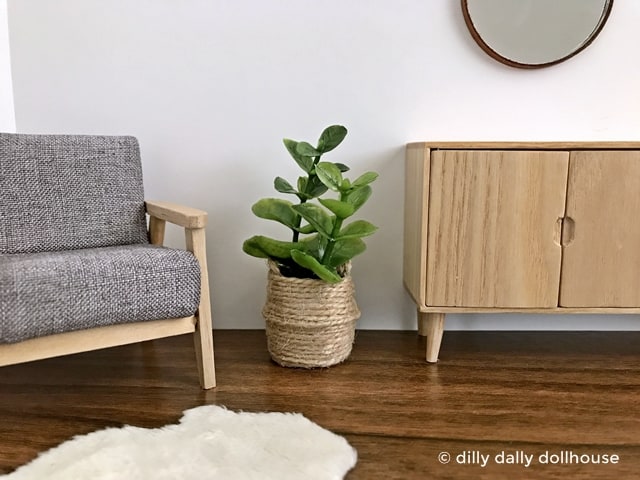
The belly basket is the ultimate boho planter. Not a very practical one since you can’t plant directly in it, and you probably shouldn’t get it wet. It’s so pretty, though! The texture, the natural color… such a perfect complement to the green of the fiddle-leaf fig. Here is a tutorial to make your own 1:12 (also works in 1:16 scale) dollhouse miniature belly basket, as a planter or you can leave it as a basket. The finished size of the basket is about 1″ to 1.25″ all around.
Materials for belly basket planter:
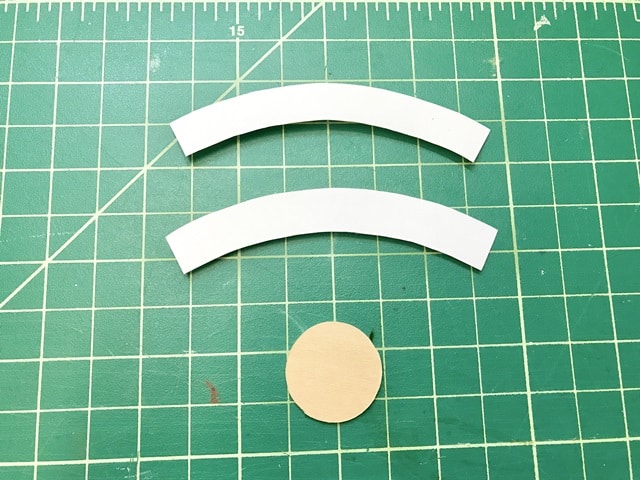
- template for the base shape (download here, and print on cardstock)
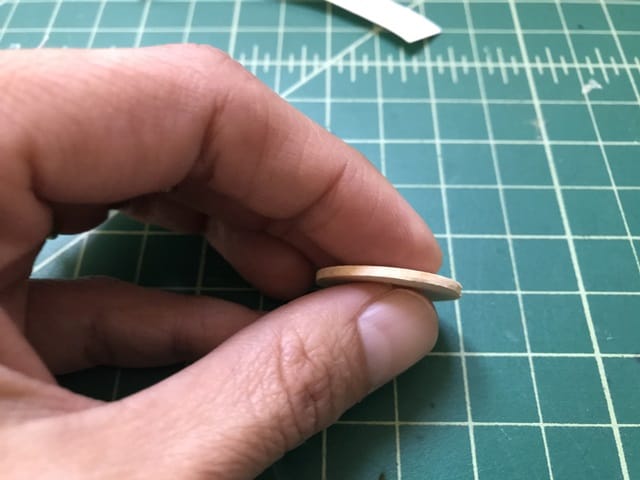
- one-inch wooden craft circle (or cut a few pieces of cardstock circles using the template included)
- jute twine (or other kinds of craft twines like cotton or hemp)
- craft glue (Aleene’s is my go-to)
- toothpicks for applying glue
- clear tape
- optional (to make fiddle-leaf fig):
Instructions for belly basket planter:
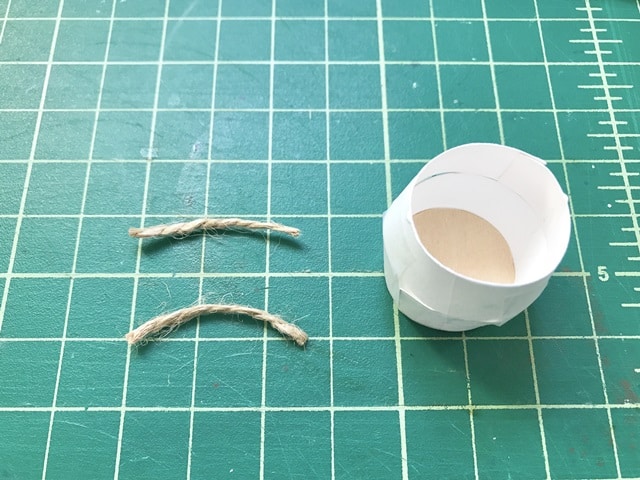
1. Print and cut the base template on cardstock
Cut both of the curvy template on cardstock. If you are not using a wooden craft circle, cut out the circle templates also. You want to stack 3-4 of the circles and glue them together to get some thickness. The thickness will make it easier to attach the body template. In my pictures, I’m using a 1/16″ basswood cutout from my leftover stash. You can also use a 1″ round mirror if you have one laying around.
2. Make the base for the basket body
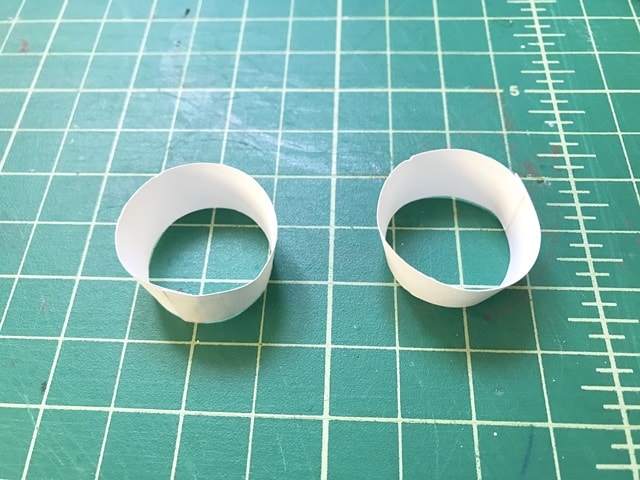
Wrap the inner/shorter length of the curvy cutout around the circle. It’s best to do it on a table to make it level. There will be a little overlap to make it easier to tape. (You could glue the overlap, but I find it easier and faster to use small pieces of tape, and the tape will be covered with twine anyway.) You now have an angled bowl shape.
Make another, so you have two bowls: one for the bottom half of the basket, one for the upper half.
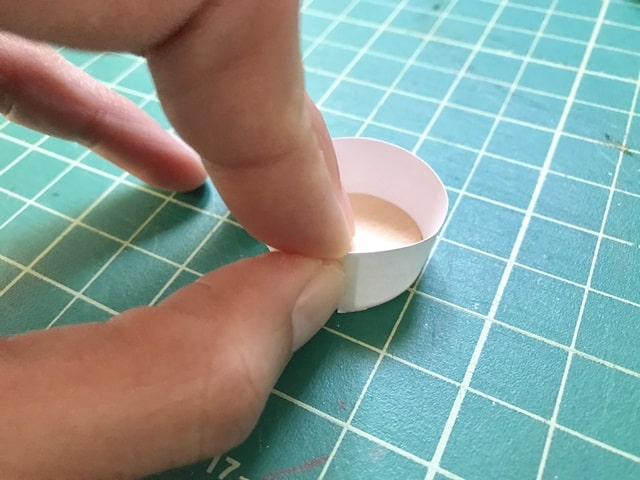
Take the other bowl (the upper half), align and tape it atop the bottom half. Now you have the full cardstock base of the body.
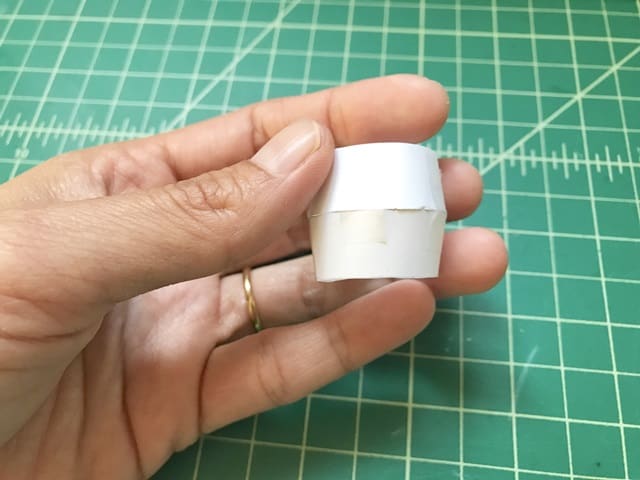
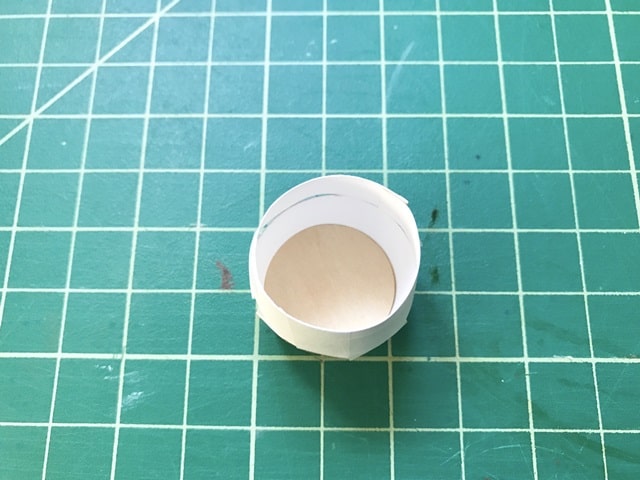
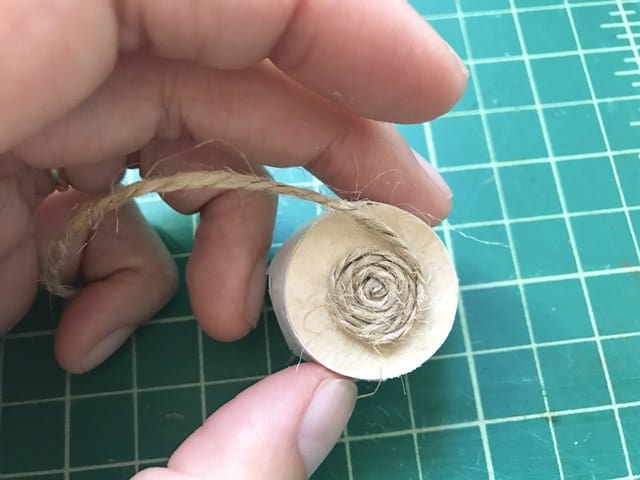
Insert the wooden circle to the base of one of the bowls, and tape it up. You now have a completed basket base with a bottom.
3. Prepare two pieces of twine for the handles
Each handle should around 1.5 inches long (you can always cut them shorter, if needed). I attach the handles to the body later, but you can attach them now if you prefer. But it’s best to at least cut them out now, before you wrap the twine on the entire basket body.
4. Wrap jute twine to the cardstock base
Adding a thin layer of glue is best, so excess glue doesn’t ooze out in between the twine. Start by spreading a thin layer of glue in the middle of the bottom of the basket base. Then, starting in the middle point, attach the twine in a circular shape. The initial spiraling is the trickiest, but it gets easier after you have a couple of spiral rounds.
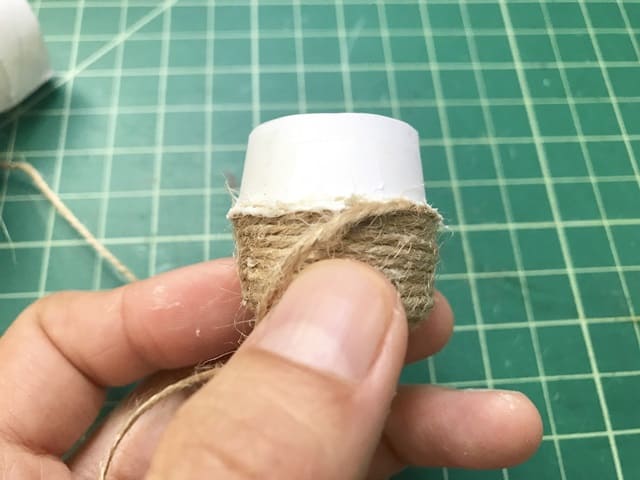
Add more glue to the cardstock base as you wrap upward.

When you get to the “waist” of the basket, wrap another layer of twine on top of the last one. You’ll have two layers of twine in the middle . This is the “fold” look that is characteristic of a belly basket.
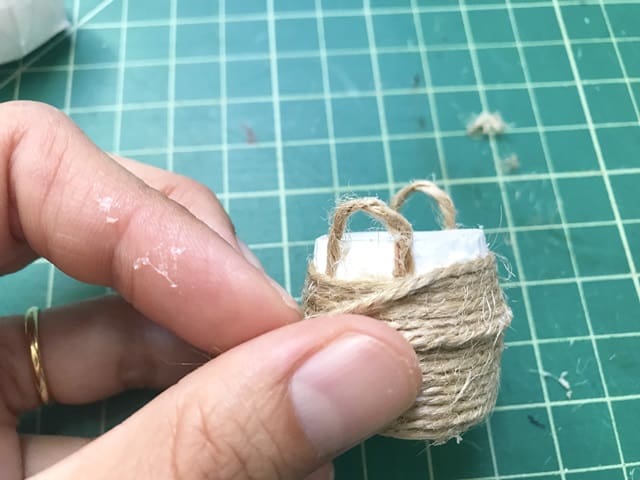
5. Attach the handles
Before you cover the last 1/4″ of the upper body, attach the basket handles that you had cut out from step 3 (if you haven’t already done so in step 3). Then, keep gluing and wrapping until you cover the cardstock completely.
Now you have the finished belly basket!

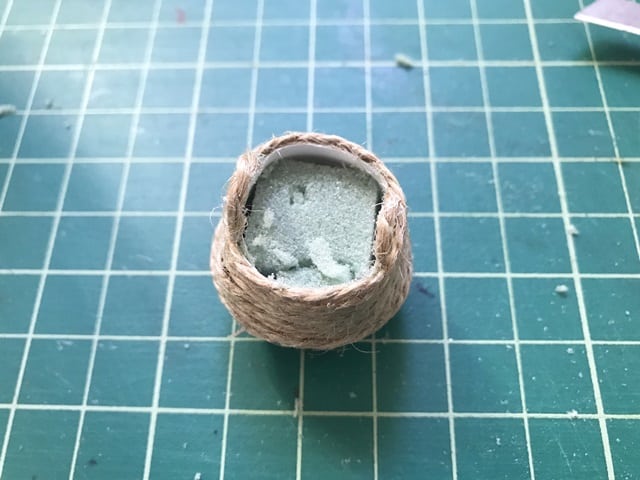
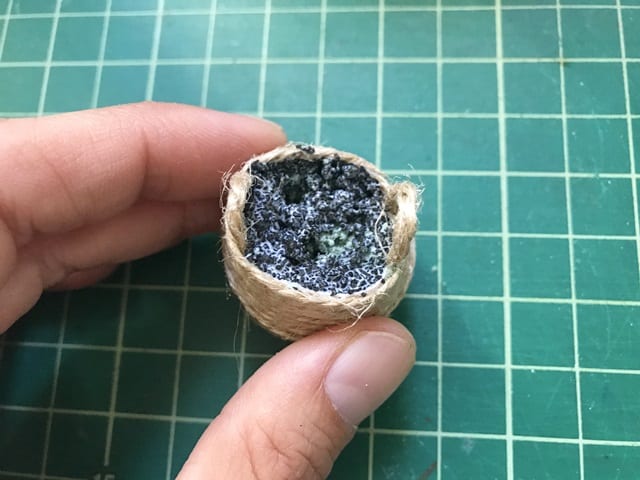
6. Optional: Add floral foam, dirt and greeneries
The following steps are for making the miniature Fiddle-leaf Fig, so you don’t need to complete it if you intend to make just the basket:
- Insert floral foam
- Cover floral foam with “dirt”, which is a mixture of coarse stone granules and a bit of craft glue (do about 2:1 ratio of granules to glue).
- Craft moss is also an option to cover the foam.
- Or you can skip this part, if your greeneries are large enough to hide the foam.
- Stick in some greeneries
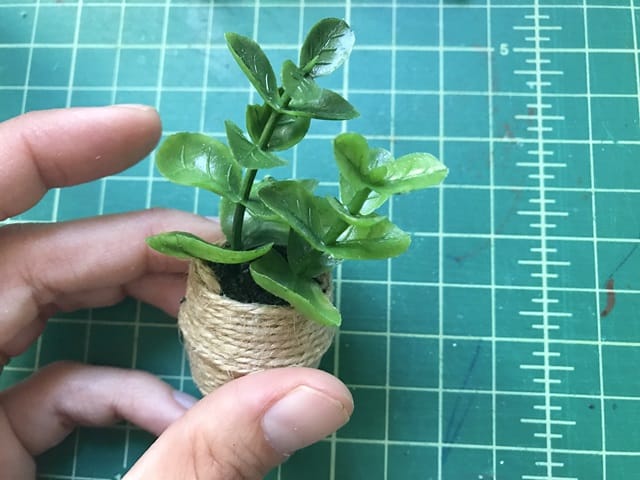
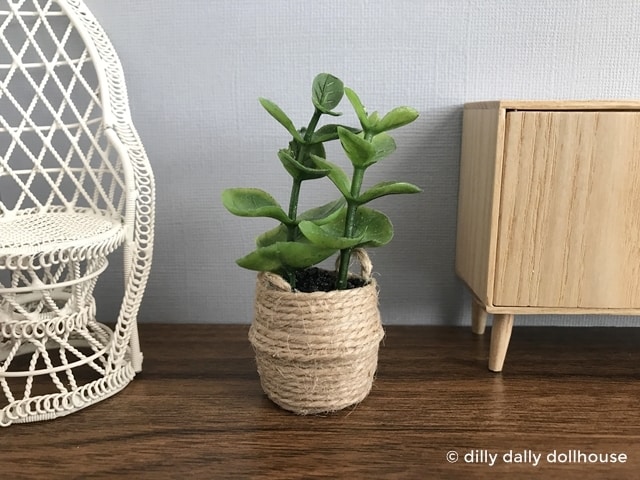
Voila! That’s it! That was pretty easy, wasn’t it? You can now have your 1:1 and miniature boho-chic fiddle-leaf fig in a belly basket planter!
Made your own? I’d love to know!
What motivates me the most is seeing you use my tutorials to make your own minis! There are many ways you can share your projects:
- comment below to let me know (or if you have any questions about it–for the benefit of others also!)
- link back to my site or this tutorial,
- tag me on Facebook or Instagram,
- share your version on my Facebook group!
Also im malaysian and it’s actually 09:37 PM right now and i like the basket you made 😀
‘Tis awesome😁😁😁😁😁
the links to you templates does not work
Thank you for letting me know! I’ve fixed the link 🙂