
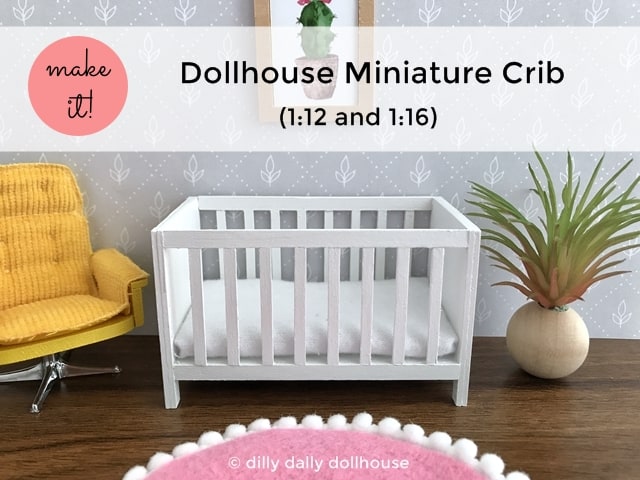
This crib was born out of necessity. One of the more popular items in my Etsy shop is a round rug with pompom trim, which is the perfect nursery rug. But I had no proper crib to set the nursery scenes, and had to use a Calico Critters crib, which is much smaller than a standard crib. So I decided to make a true 1:12 crib (and 1:16 too, because I love Lundby), inspired by this IKEA crib (I also love IKEA). Here is a tutorial on how to make a dollhouse miniature crib in both 1:12 and 1:16.
Download SVG cut file and/or PDF template
I highly recommend using Cricut Maker for cutting out these pieces, for best accuracy. It’s also just plain easier! You can dowload the SVG and PDF files below.
You also dowload the SVG files from my resource library, and import to Design Space. My resource library is where I keep all of my SVG cut files, printables, and templates for my subscribers. It’s free to subscribe!
The PDF template is helpful as a guidance on the measurements of each piece.
Quick tip: when you import the SVG to Design Space, leave the file grouped while you resize it to the correct scale. Use the test square as guidance (you’ll want it to be 1-inch square). Here is a quick video tutorial on importing and resizing SVG files into Design Space.
Materials for dollhouse crib in 1:12 scale
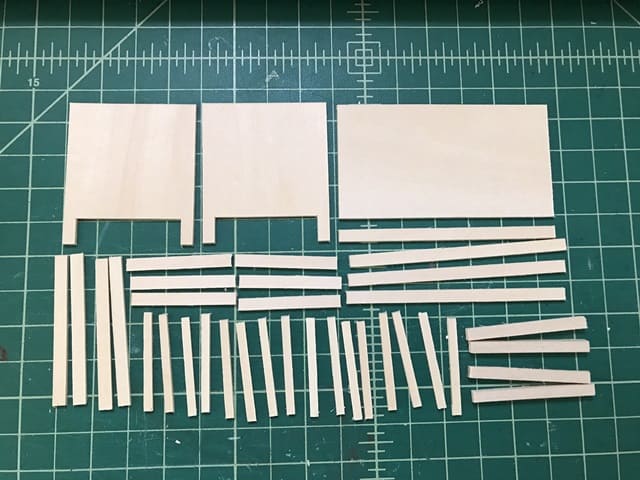
- 1/16 thick basswood, cut as follows (all measurements in inches) ~ you can also refer to the PDF file
- 1 each of 2-1/4 x 4-1/4 for the mattress base
- 2 each of 2-3/8 x 2-3/8 for the end panels
- 4 each of 1/4 x 1/2 for the legs
- I cut my pieces using Cricut Maker and combined the legs with the end panels
- 4 each of 1/4 x 4-1/4 for the railings
- 4 each of 1/4 x 2-7/8 for the vertical trims at end panels
- 6 each of 1/4 x 1-7/8 for the horizontal trims at end panels
- 22 each of 1/8 x 1-7/8 for the railing slats (you can cut a few extras for backup/replacements)
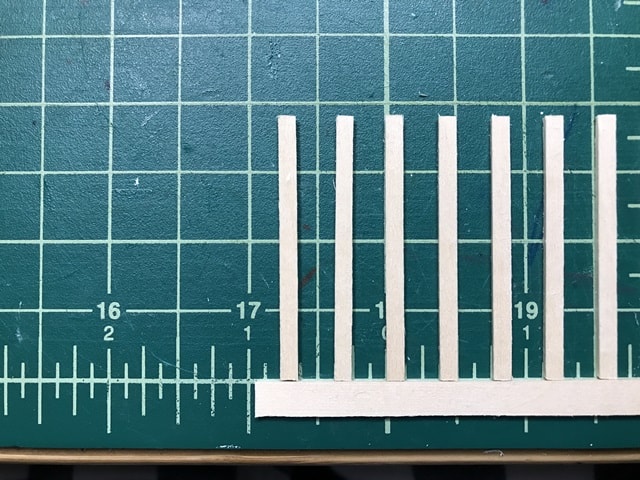
- Tip: Cut out a 3-1/4 x 1-7/8 rectangle with the 1-7/8 along the grain, then slice at 1/8 to make the individual slats. This will ensure your slats are at the same height, making it easier and neater to attach to the railing. You will end up with a few extra slats for backup.
- 3/16 x 3/16 balsa or basswood square dowel, cut 4 pieces at 2-1/4 length, for the mattress base support beams
- Wood glue
- toothpicks for applying glue (optional)
- graph paper with 1/4″ grid or a cutting mat for lining up the slats
Materials for dollhouse crib in 1:16 scale
- 1/16 thick basswood, cut as follows (all measurements in inches) ~ you can also refer to the PDF file
- 1 each of 1-3/4 x 3-1/4 for the mattress base
- 2 each of 1-7/8 x 1-3/4 for the end panels
- 4 each of 3/16 x 3/8 for the legs
- Note: I cut my pieces using Cricut Maker and combined the legs with the end panels
- 4 each of 3/16 x 3-1/4 for the railings
- 4 each of 3/16 x 2-1/8 for the vertical trims at end panels
- 6 each of 3/16 x 1-1/2 for the horizontal trims at end panels
- 16 each of 1/8 x 1-3/8 for the railing slats (you can cut a few extras for backup/replacements)
- Tip: Cut out a 2-1/2 x 1-3/8 rectangle with the 1-3/8 along the grain, then slice at 1/8 to make the individual slats. This will ensure your slats are at the same height, making it easier and neater to attach to the railing . You will end up with a few extra slats for backup.
- 1/8 x 3/16 balsa or basswood strips (you can use 1/8 x 1/8 also), cut 4 pieces at 1-3/4 length, for the support beams of the mattress base
- Wood glue
- toothpicks for applying glue (optional)
- graph paper with 1/4″ grid or a cutting mat for lining up the slats
How to make miniature dollhouse crib
The pictures here are showing the 1:16 scale, but the construction is the same for 1:12, with a slight variation on Step 3 (the slats).
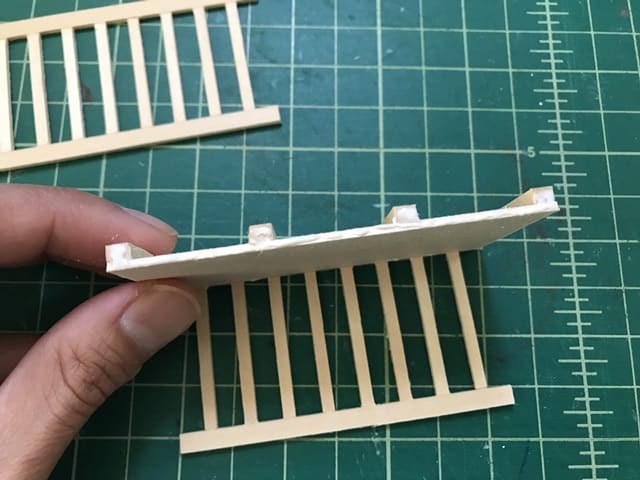
1. Attach the four (4) balsa support beam strips to the mattress base
Glue the 1/8 x 3/16 support beams to the mattress base. One at each end, and two towards the middle, evenly spaced. The support beams will not be visible when the finished crib is upright, so you can eyeball the spacing if you want (I did). The main purpose of the support beams is to provide gluing surface when attaching the railings. Clamp or place under a heavy item (I use a college textbook) to strengthen the bond.
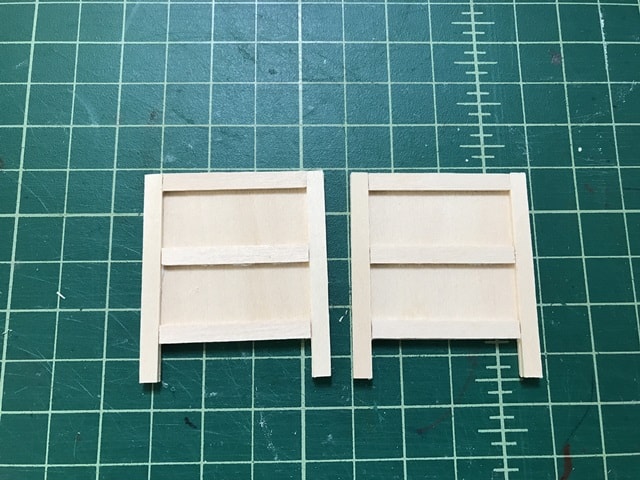
2. Prepare the end panels
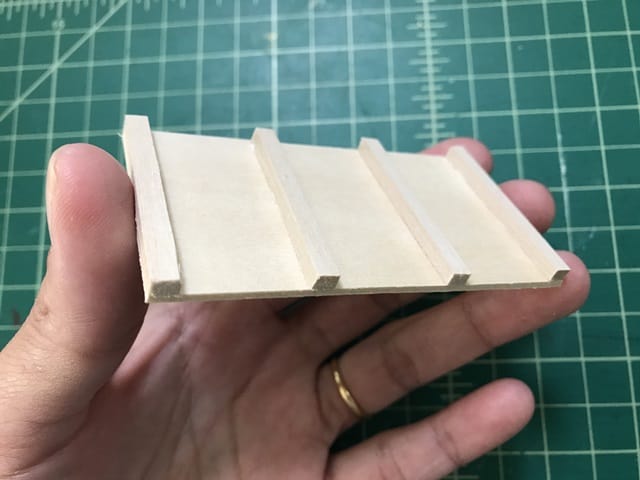
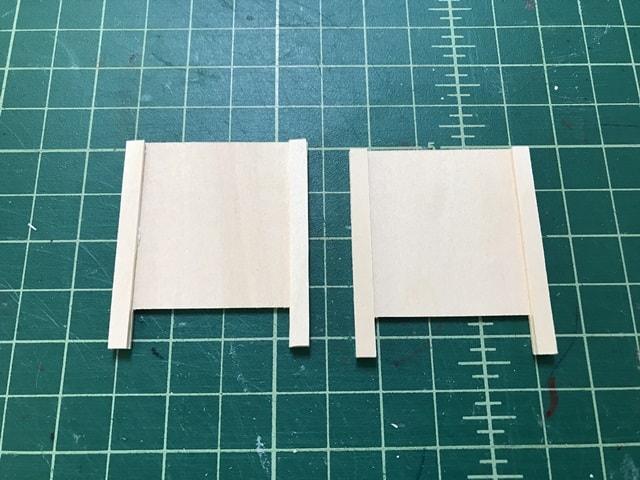
If the legs are not yet attached, do so at this step. Attach the vertical trims to the end panels, then the legs to the vertical trims. Then attach the horizontal trims, evenly spaced. Repeat to make two end panels. Set aside and clamp or place under a heavy item to strengthen the bond.
3. Prepare the railings and slats (1:12 and 1:16 variations)
Tip: Use the lines of a graph paper or your mat as guidance to get straight lines and to measure the spacing. Handle very gently from here on, as it can get frustrating when the slats fall off.
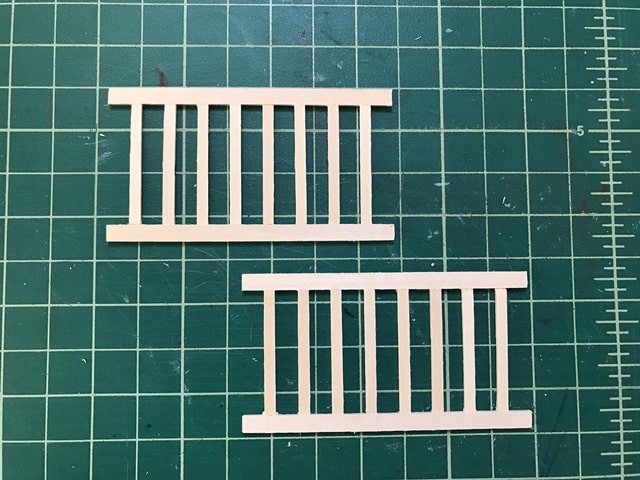
For 1:12 scale, you will use 11 slats for each side. On one railing, start with 3/16″ space at the beginning, then glue and attach the slats at 1/4″ apart. You will end up with 3/16″ space at the end, which is the same as the beginning. It makes for a nice balance.
For 1:16 scale, you will use 8 slats for each side. On one railing, start with 1/4″ space at the beginning, then glue and attach the slats at 1/4″ apart. The end space will also be 1/4″, so everything is evenly spaced.

Dot some glue (toothpicks would be handy for this!) on the ends of the slats, then attach the upper railing to the slats. Hold the piece together on the mat or table for a few minutes while the glue dries up a bit. Make sure there is no glue oozing on the side facing the mat or table, else it will get stuck there! Repeat step 3 to make 2 railings.
4. Attach the railings to the mattress base
Put a bit of glue along the sides of the mattress base and the ends of the support beams, and attach the railing on each side. Clamp or hold together squarely for a few minutes while making sure everything is straight and level. The upper railings may have a tendency to narrow in, make sure to hold them square.
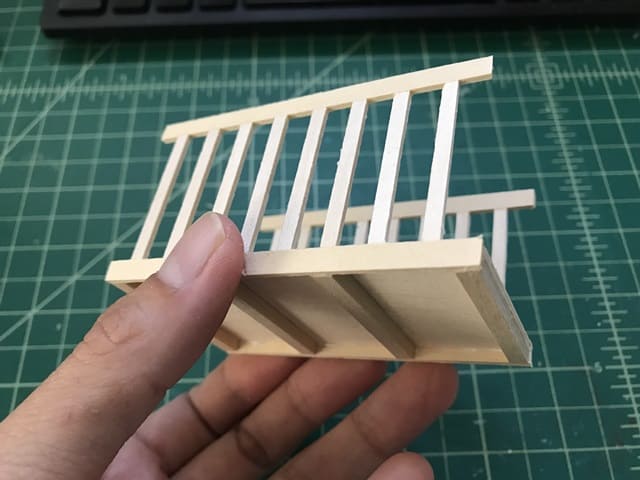
5. Attach the end panels to the railings
Put some glue along the ends of the mattress base and the sides of the support beams, and on the ends of the upper railing. Attach the end panel on each side.
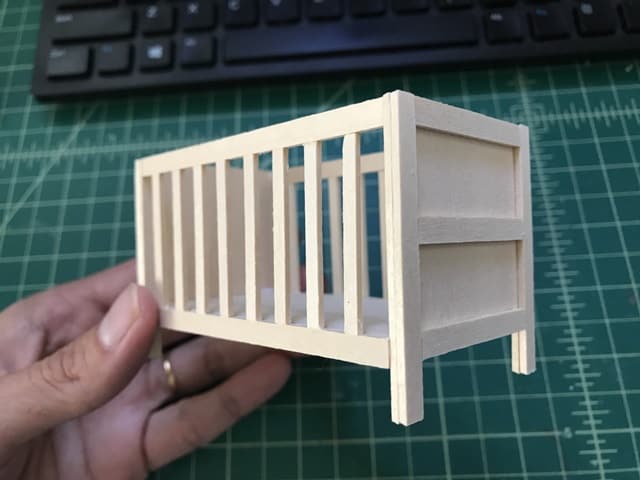
Clamp or hold together (I use a couple of rubber bands around the railings) and make sure everything is straight and level. Wait a few hours for the glue to dry and cure before finishing/painting.
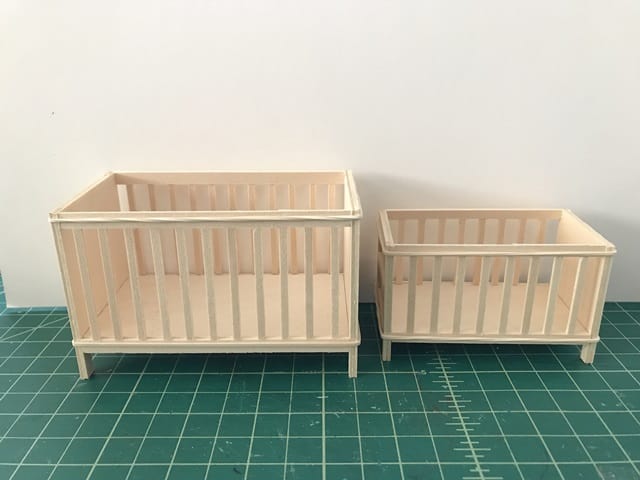
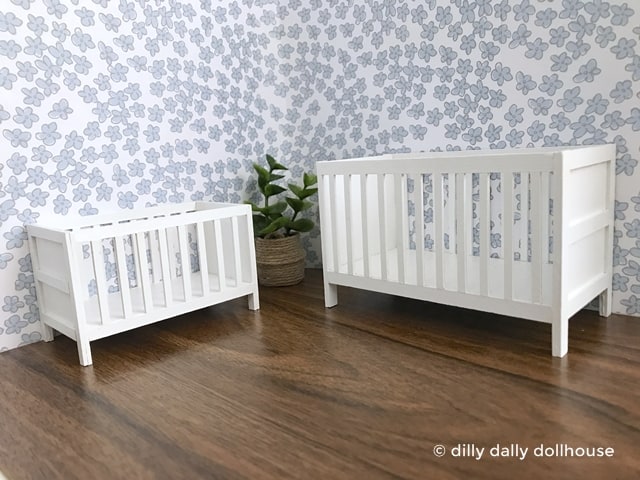
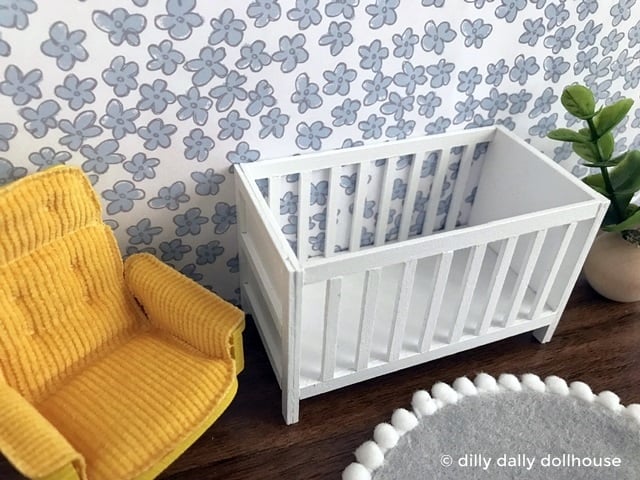
You can then sand and stain or paint it, and make the no-sew crib mattress. Here are the cribs that I made. My husband’s first reaction upon seeing the 1:12 version was “which giant baby will you put in it?”. Our family is used to seeing Lundby and Calico Critters furniture.
Complete!
Made your own? I’d love to know!
What motivates me the most is seeing you use my tutorials to make your own minis! There are many ways you can share your projects:
- comment below to let me know (or if you have any questions about it–for the benefit of others also!)
- link back to my site or this tutorial,
- tag me on Facebook or Instagram,
- share your version on my Facebook group!