
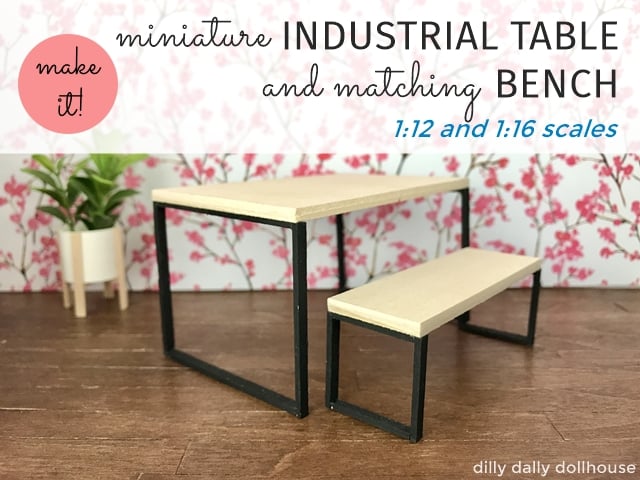
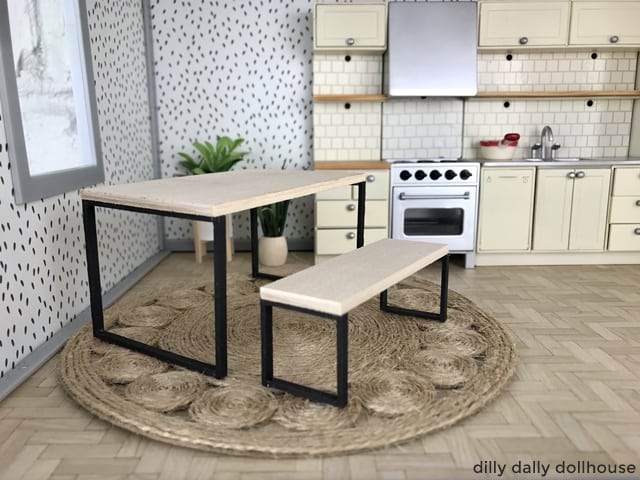
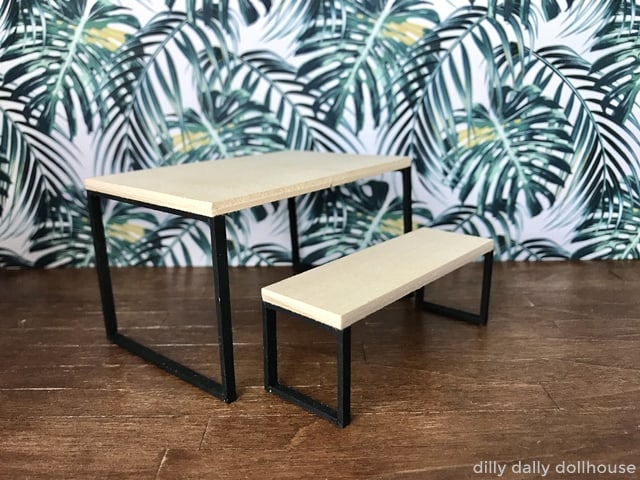
Need an easy project that still makes a big design impact in your dollhouse scene? This set of miniature industrial table and matching bench is it! If you see it and say to yourself “I can totally make that”, you’re right. I’m making it even easier by giving you the measurements right here!
My table top is left unfinished as I like to see the high contrast of the light basswood color and black “metal” legs, but it would also look very nice with a darker stain.
Materials to make Miniature Industrial Table/Bench
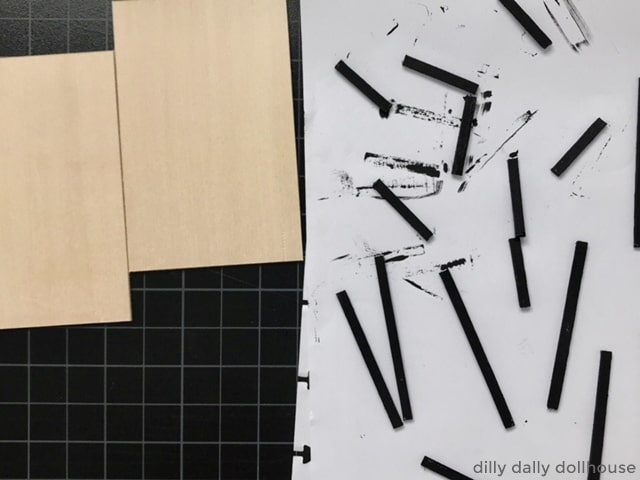
For the 1:16 scale table and bench that are pictured here, I used 1/16″ basswood cut by Cricut. It’s perfectly fine to use 1/8″ materials and cut by hand (or a laser cutter), although you will need to adjust the measurements (which I’ll go over in the next section).
You can also choose balsa for the table/bench top. Balsa dents easily, so it adds more of a rustic, worn look.
- 1/16″ basswood sheet
- Cricut Maker
- Purple StrongGrip Mat
- Knife blade
- Black acrylic paint
- Wood glue
Measurements for Miniature Industrial Table/Bench
Download the PDF measurement guide here for 1:12 scale and 1:16 scale.
For the SVG file, head on the the resource library where you can grab it for free!
Love free stuff? The Resource Library is where I keep my digital freebies… such as SVG cut files, dollhouse printables, and other miniature templates. It’s my thank you gift to my email subscribers! If you’re already a subscriber, you can refer to my latest email for the library password. Not a subcriber yet? You can sign up for free here!
Adjusting the Measurement for 1/8″ Material
As you can see on the measurement guide, you can use 1/8″ material for the table/bench top without changing the measurement.
If you’d like to use 1/8″ material (such as 1/8″ x 1/8″ basswood sticks) for the “metal” legs, you will want to reduce the across legs length by 1/8″. So for a 1:12 scale table, reduce the current across legs from 2-7/8″ to 2-3/4″. That’s all that needs to change!
The upright legs length don’t need to be changed, even if you’re using 1/8″ sticks.
Assembling the Miniature Industrial Table/Bench
Step 1: Paint (and stain) your pieces first
I paint my table legs black and leave the table top unfinished
Step 2: Put together the table top
If you are using one layer of 1/8″ material, you can skip this step.
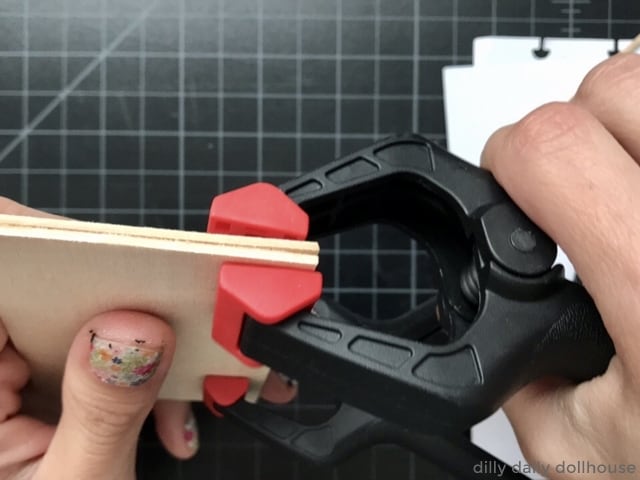
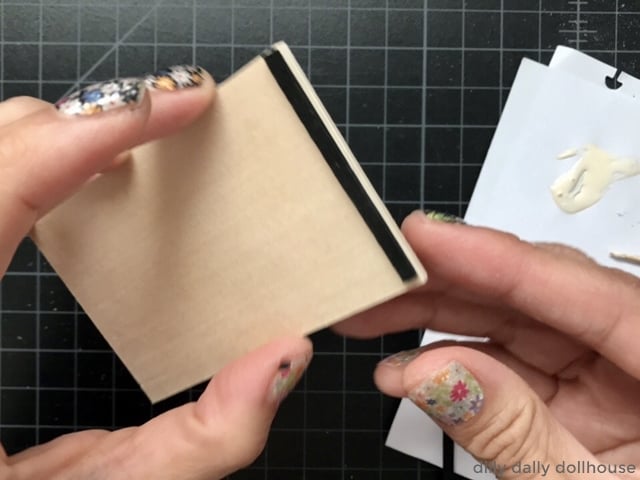
If you are using two layers of 1/16″ material, glue them together and clamp at the edges so no there is no visible gap. Set aside to dry, and sand to smooth out any uneven edges.
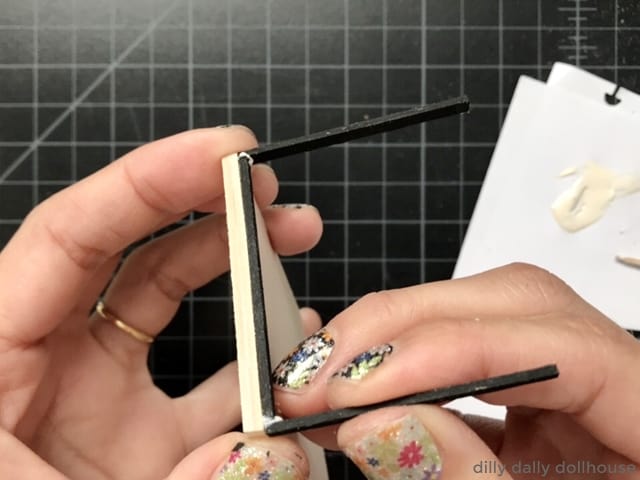
Step 3: Attach the legs
I find it much easier to assemble the legs in the following order:
- Attach one across-leg to the bottom of the table top. You will have 1/6″ space at each end (or 1/8″ if you are using 1/8″ sticks)
- Attach the upright-legs, taking care to keep everything square.
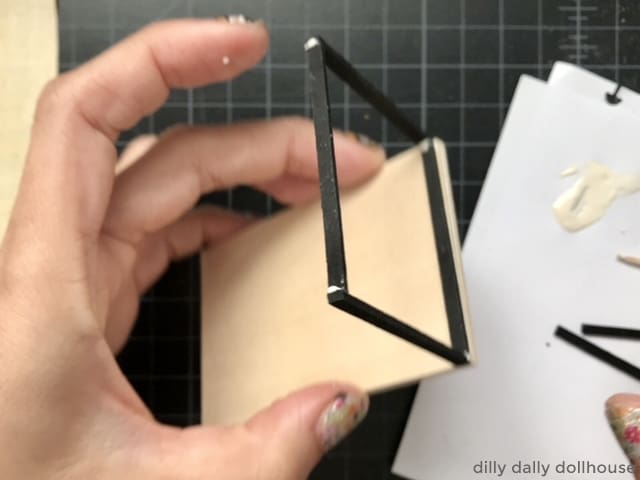
- Attach the other across-leg at the bottom, while keeping everything square. Don’t be sloppy like me… wipe off excess glue.
- Repeat for the other side and watch the glue dry.
Oh, the blurry photos? I was experimenting with time lapse video and it turned out as you see. 😜
Complete!
If you like the look of these miniature industrial table and bench, you may also like this mid-century slat coffee table that has a similar style (except it’s a bit more involved to assemble).
Made your own? I’d love to know!
What motivates me the most is seeing you use my tutorials to make your own minis! There are many ways you can share your projects:
- comment below to let me know (or if you have any questions about it–for the benefit of others also!)
- link back to my site or this tutorial,
- tag me on Facebook or Instagram,
- share your version on my Facebook group!