
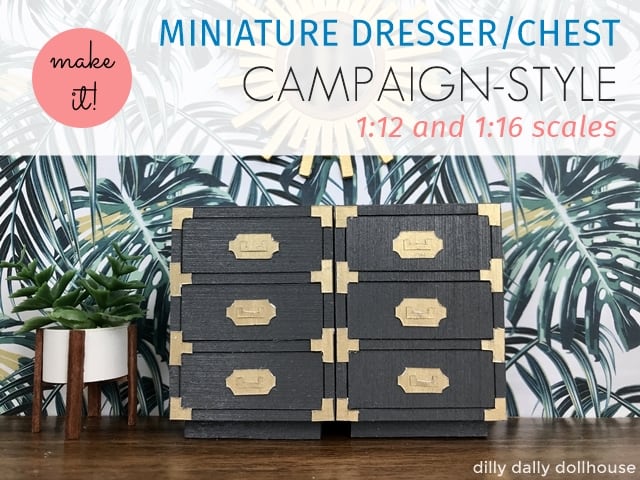
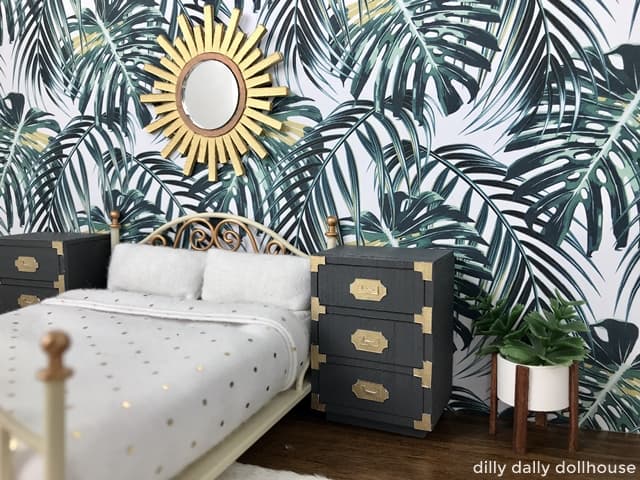
The idea for this miniature campaign dresser was born when I was trying to take pictures of these miniature gold mirrors. I realized that I didn’t have a good console-type miniature for the mirrors to hang above for, say, a hallway scene. Instead of a console, I thought the “brass hardware” of a campaign dresser would be more complementary to the gold-tones of the mirrors. A dresser also seems to be a more flexible piece of mini, as it can work in an entryway or as a nightstand in the bedroom.
For simplicity’s sake, this dresser is designed with faux drawer fronts. You can choose to cut the drawer fronts using basswood to showcase the wood grains when staining. For a smooth finish, I recommend using thick cardstock and spray painting.
As far as the frame itself, you can use any 1/16″ thick material. My preference is 1/16″ basswood, and sometimes I would use 4-ply matboard for testing. You can also cut out some wood veneer for the exterior of the frame, if you have no basswood on hand but still want to get the wood-look.
TOOLS AND MATERIALS FOR MINIATURE CAMPAIGN DRESSER
- Cricut Maker for cutting the frame pieces (or other die-cut machines, adjust material accordingly)
- Cricut purple StrongGrip mat and knife blade
- Craft knife and ruler for cutting tiny hardware pieces
- I had better results cutting these small pieces using a craft knife and ruler compared to using Cricut.
- Glue
- Wood glue (plus toothpick) for the frame
- Elmer’s craft bond for the hardware
- Craft tweezers for handling hardware pieces
- Gold pen/marker (this one is awesome!)
- 1/16″ basswood
- I recommend MidWest Products basswood sheets in 8″ wide if you can find them, or at least 6″ wide (on eBay)
- Alternatively, 4-ply matboard (or other material of the same thickness)
- Cardstock for the hardware
- I didn’t test regular paper but it may work, as the hardware is purely decorative.
- Spray paint (semi-gloss or gloss) or wood stain
TEMPLATES FOR MINIATURE CAMPAIGN DRESSER
Notes on Cutting/Materials
- The BLACK frame pieces are to be cut on your main 1/16″ material. If using basswood, be mindful of the grain directions. Ideally all the frame pieces run in the same direction (except the inner side pieces, for which the grain direction doesn’t matter much).
- The RED drawer-front piece can be cut on the same material as the frame or on cardstock. The inner rectangles don’t have to be cut completely.
- The BLUE hardware pieces should be manually cut on cardstock (recommended), although using Cricut is doable (but the result is not as good).
Download the guides/files
Download the PDF measurement guide for 1:12 scale or 1:16 scale.
Download the SVG files for 1:12 scale and 1:16 scale from the resource library.
Love free stuff? The Resource Library is where I keep my digital freebies… such as SVG cut files, dollhouse printables, and other miniature templates. It’s my thank you gift to my email subscribers! If you’re already a subscriber, you can refer to my latest email for the library password. Not a subcriber yet? You can sign up for free here!
INSTRUCTIONS FOR DRESSER FRAME
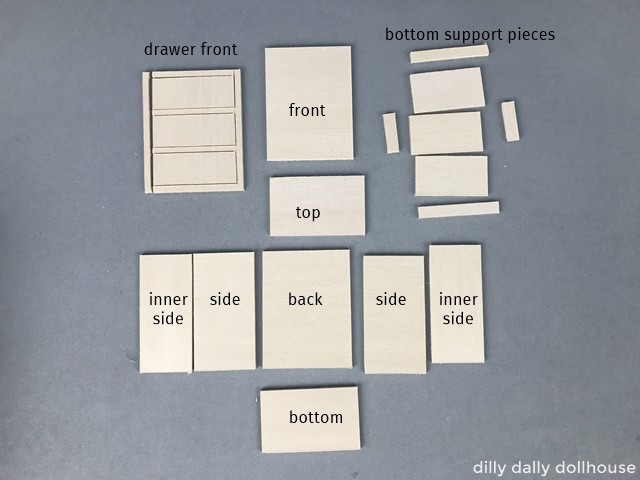
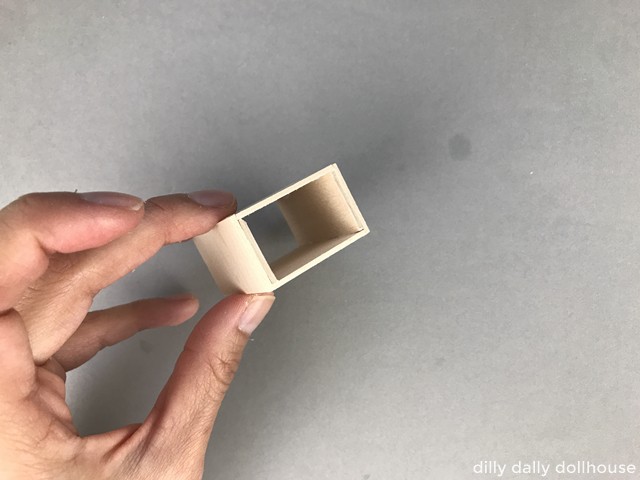
Step 1: Cut the frame pieces
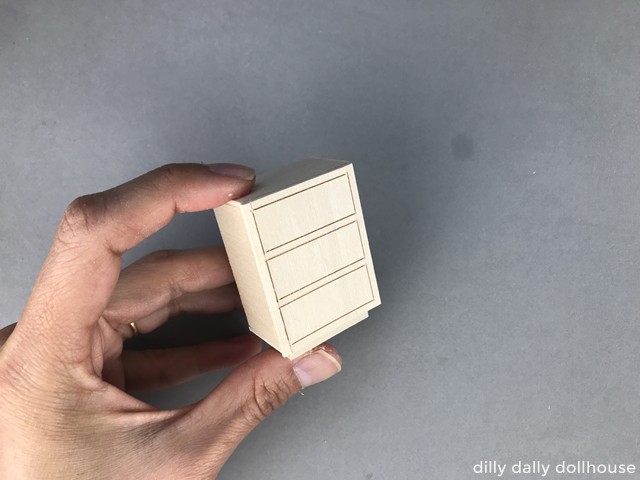
I cut my pieces at horizontal grain direction. Don’t mind the broken drawer front… the seams will be hidden by the hardware (also I cut it on at the wrong grain… oops!). Notice that my drawer rectangles aren’t cut completely through, and this is perfectly fine as they are non-working drawers.
Step 2: Stain first
If you choose to stain your dresser, do it now. Painting can be done after the frame is assembled.
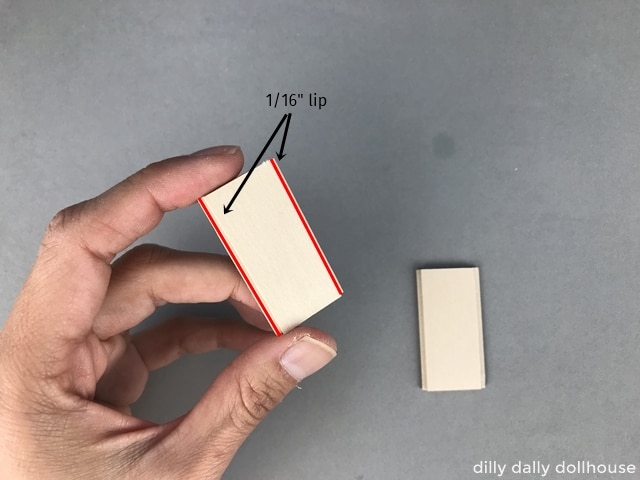
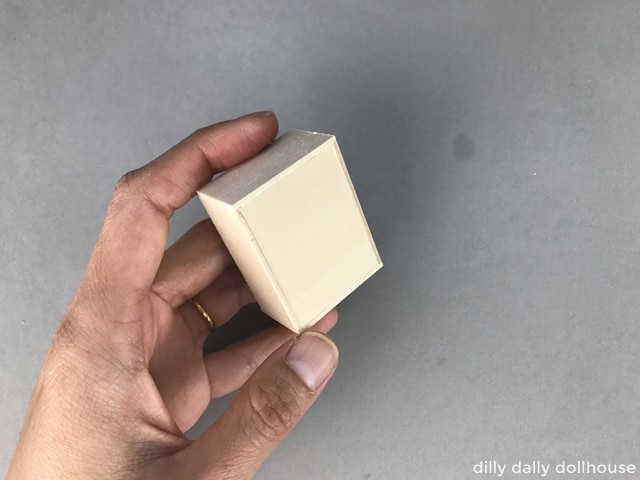
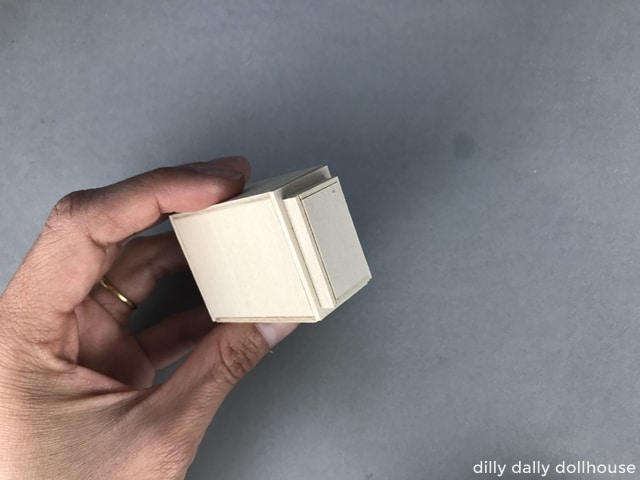
Step 3: Assemble the frames
Attach the inner-side piece to the side piece, leaving a 1/16″ lip on each long side. Repeat for the other side.
Attach the front and back.
Attach the top and bottom.
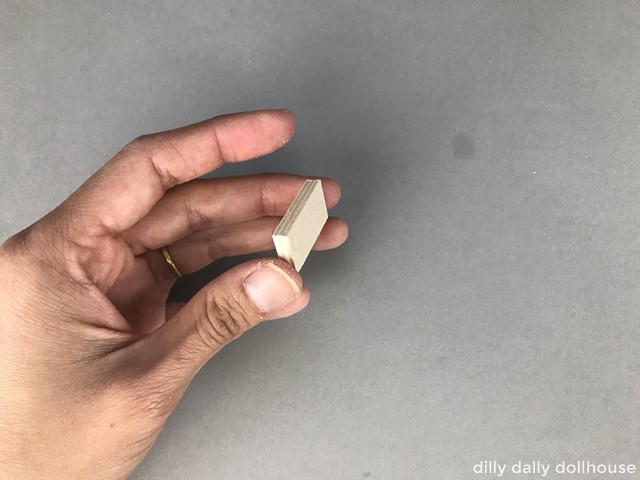
Step 4: Assemble the bottom support
Glue and stack the rectangle pieces of the bottom support.
Attach the side covers.
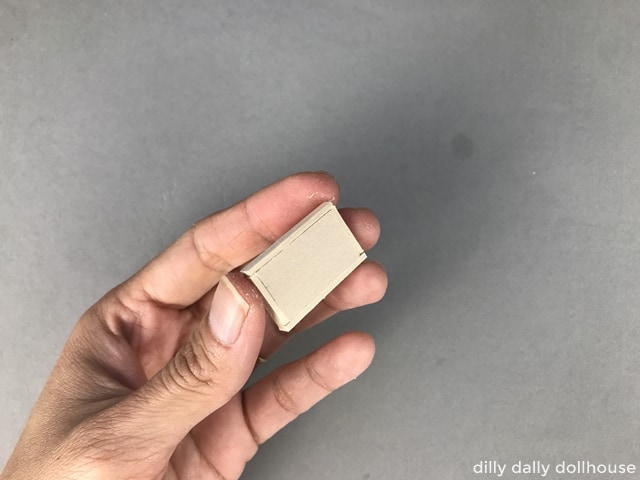
Attach the bottom support to the center of the frame bottom.
Step 5: Attach the drawer front
Step 6: Paint
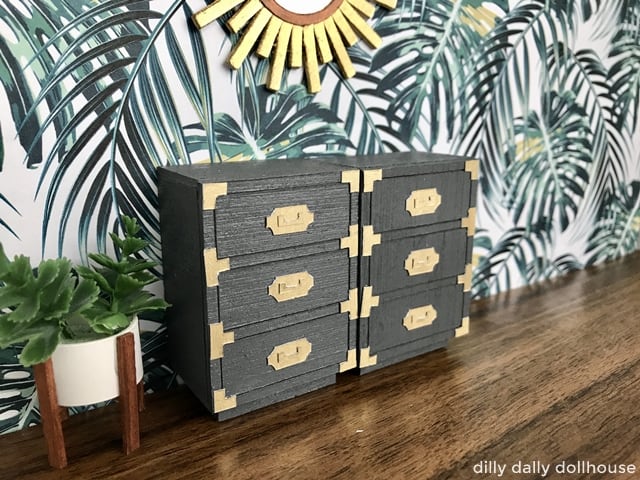
Spray paint is ideal for quick, even coverage. Pick a strong color that makes the hardware “pop”, such as emerald green, peacock blue, deep red, or black. I only have dark gray so that’s what I used, and it turned out great!
INSTRUCTIONS FOR “HARDWARE”
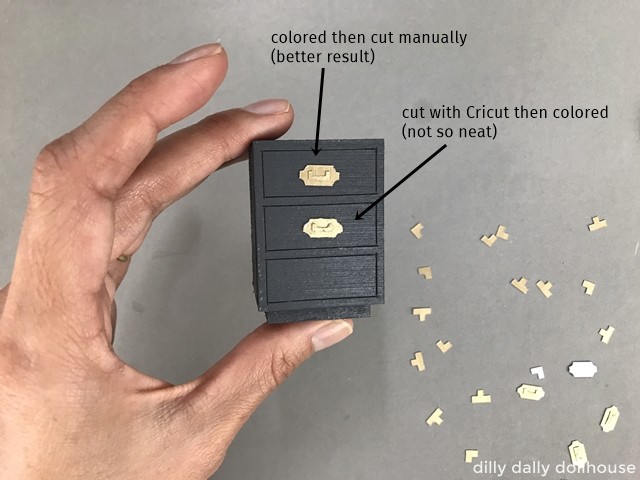
I wasn’t too happy with the result from cutting the hardware pieces with Cricut and then coloring them with the gold pen. Cricut can cut tiny pieces (the handle for 1:16 scale is as narrow as 0.05″), but the cuts aren’t clean. Additionally, coloring tiny pieces of paper proved very challenging. The color ended up uneven and blotchy, and the moisture from the ink caused the edges of the cardstock to raise slightly.
So I tried again by coloring the hardware first, then cutting manually. It might be hard to tell the difference in this next picture, but the color-then-manual-cut pieces turned out much neater than Cricut-cut-then-color.
These are my specific (recommended) steps:
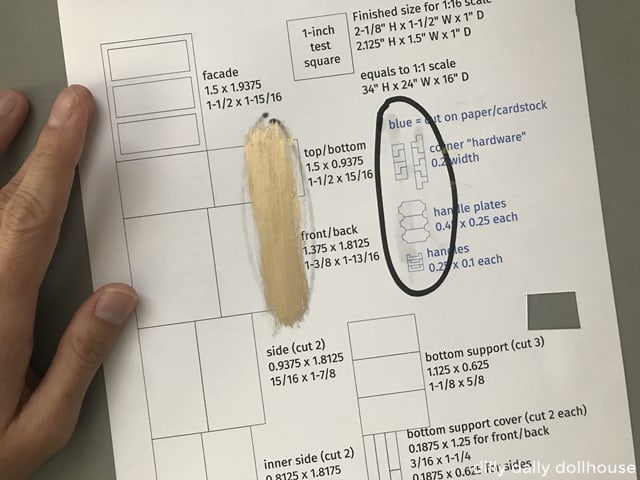
Print the PDF measurement guide using the thickest cardstock/paper that your printer can accommodate.
Color the BACKSIDE of the paper, behind the hardware pieces. I used a marker that bleeds to the other side, so I know where to color. Don’t color the front side of the paper, because the lines would be covered up and you won’t know where to cut.
I hope this picture isn’t too confusing. I was making two sets of the dresser, so I printed on both sides of the paper.
After the backside is colored, cut all the pieces manually.
Glue the handles to the base plates, then attach all hardware to the dresser front.
COMPLETE!
The planty wall fits better for “glam” pieces like this miniature campaign dresser.
Made your own? I’d love to know!
What motivates me the most is seeing you use my tutorials to make your own minis! There are many ways you can share your projects:
- comment below to let me know (or if you have any questions about it–for the benefit of others also!)
- link back to my site or this tutorial,
- tag me on Facebook or Instagram,
- share your version on my Facebook group!
Hi there! I am the editor for American Miniaturist magazine. I would love to see this fun tutorial in print in an upcoming issue. If you are interested please email me at auralea@ashdown.co.uk
Thank you. So awesome.
OMG! Another beautiful piece! I wish I had more hours in the day, I would make them all.
Thanks, Sherrill! 💕
They’re beautiful. I’m new and learning to use my cricut maker in my miniature projects.
Thanks, Margaret! 🥰