

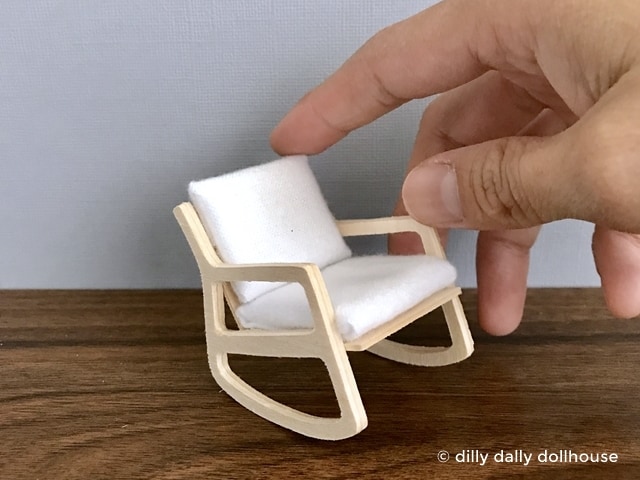
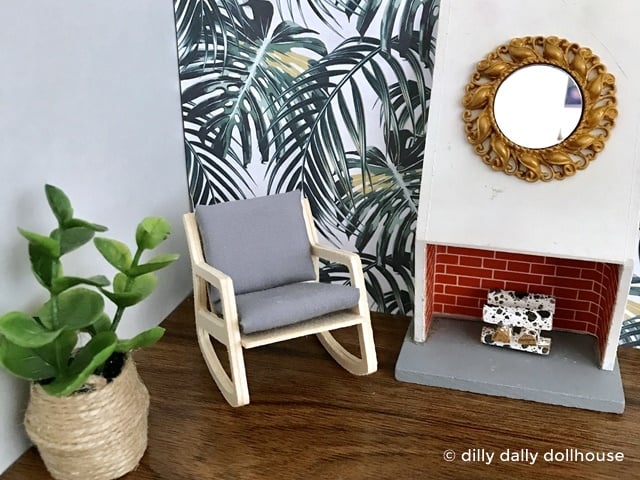
While staging my crib, I realized that I had no proper rocking chair. I could use a vintage Lundby one (1:16), but it doesn’t quite go with the modern feel of the cribs. Plus, I also don’t have any 1:12 rocking chairs. So I designed a mid-century modern dollhouse rocking chair because the simple lines are just easier. See the tutorial below on how to make one in 1:12 or 1:16 for your dollhouse!
The SVG cut files for this rocking chair is available in my resource library, which you can get for free if you’re a subscriber to my email list!
~ MATERIALS ~
Let me tell you that a cutting machine will make this project about a million times easier! Mine is a Cricut Maker that can cut through 1/16″ basswood (my favorite material). You can also use balsa or 4-ply matboard, or multiple layers of cardstock. It is still possible to cut by hand (with a craft knife, obviously, unless you’re Edward Scissorhands), though it will take a lot more patience to get all the pieces cut accurately and consistently.
FOR 1:12 SCALE ~ all measurements in inches
- Cutting template (pdf download or get the SVG cut file from the library)
- 1/16″ basswood or 4-ply matboard:
- chair side: cut 4 total (2 for each side, cut at alternating grain direction)
- chair seat: 2 x 2
- chair back: 2 x 1-7/8 (cut the longer length with the grain)
- Fabric for cushion (I used flannel)
- chair seat: 4-1/2 x 4-1/2
- chair back: 4-1/2 x 4-1/4
- Batting for cushion:
- If your fabric is thinner than flannel, e.g. quilting weight, you can add another 1/16 to 1/8 to the width and length of the cushion, so they fit more snug.
- chair seat: 3 pieces of 1-7/8 x 1-7/8
- chair back: 3 pieces of 1-7/8 x 1-1/2
- Glue (Aleene’s)
- Optional finishing touches such as paint, stain, sealer, etc.
FOR 1:16 SCALE ~ all measurements in inches
- Cutting template (pdf download or get the SVG cut file from the library)
- 1/16″ basswood or 4-ply matboard:
- chair side: cut 4 total (2 for each side, cut at alternating grain direction)
- chair seat: 1-1/2 x 1-1/2
- chair back: 1-1/2 x 1-1/2
- Fabric for cushion (I use flannel):
- chair seat: 3-1/2 x 3-1/2
- chair back: 3-1/2 x 3
- Batting for cushion:
- If your fabric is thinner than flannel, e.g. quilting weight, you can add another 1/16 to 1/8 to the width and length of the cushion, so they fit more snug.
- chair seat: 3 pieces of 1-3/8 x 1-3/8
- chair back: 3 pieces of 1-3/8 x 1-1/8
- Glue (Aleene’s)
- Optional finishing touches such as paint, stain, sealer, etc.
~ INSTRUCTIONS ~
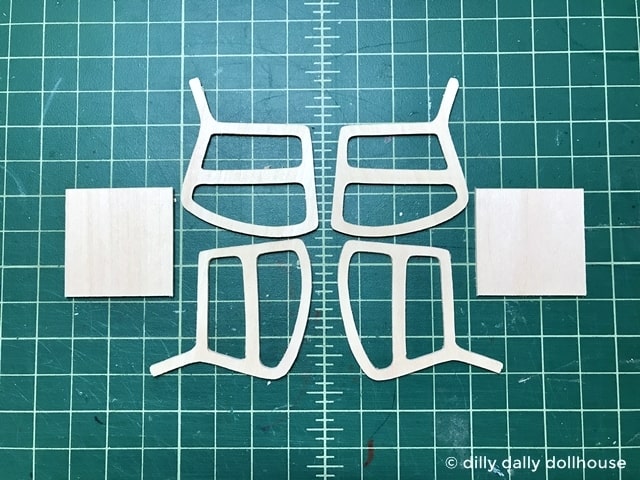
1. Cut all pieces
If you use my SVG files to cut using Cricut, do the following:
- Import to Design Space and onto the Canvas, leaving the file grouped.
- Resize so that the test square measures 1-inch square. (Use the grid on the Canvas for this!).
- When the test square measures 1 inch, the rest of the file should be correctly scaled.
- Ungroup the file, then follow your normal procedure to cut.
Here is a quick video tutorial on how to import and resize SVG files into Design Space.
You may notice two sets of the chair sides… one set vertical and one set horizontal. It’s designed for cutting on basswood, which tends to be weak across the grain. Because of that, I like to layer two pieces at th criss-crossing grain directions, to strengthen the final piece. You can leave it as-is or rotate as you prefer.
2. (Optional) Sand and STAIN the pieces before assembling
If you plan to stain, do it at this step before gluing. This is because glue prevents stain to be absorbed, and you would end up with ugly splotches.
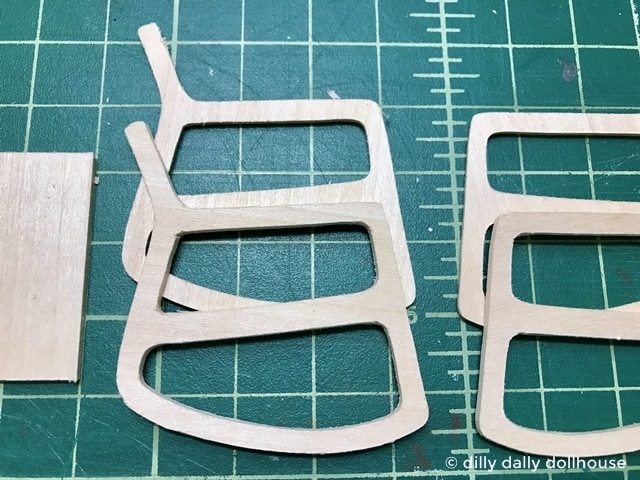
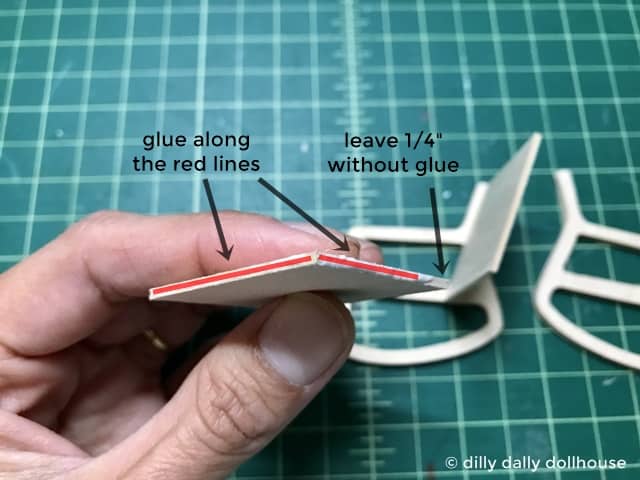
3. Prepare the chair sides.
Stack two layers of basswood at alternating grain directions. This will strengthen the chair side. You will make 2 sets of two layers for the two chair sides.
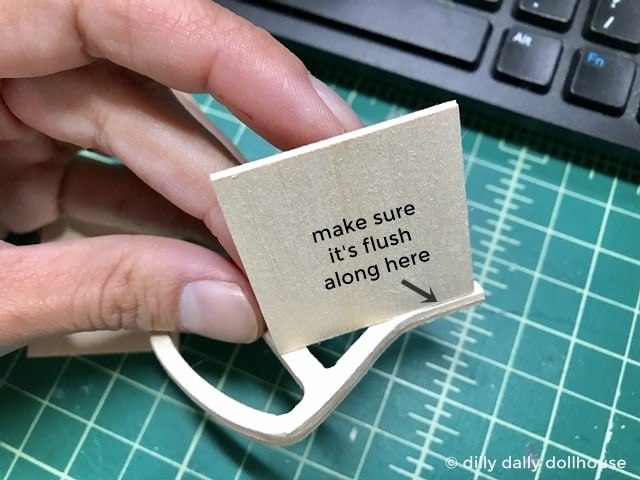
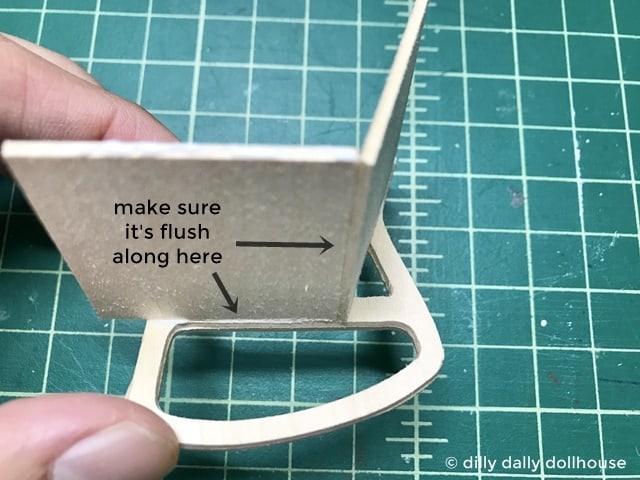
4. Attach the chair seat and back to one side.
Take care that the seat and back are flush with the straight lines of the side.

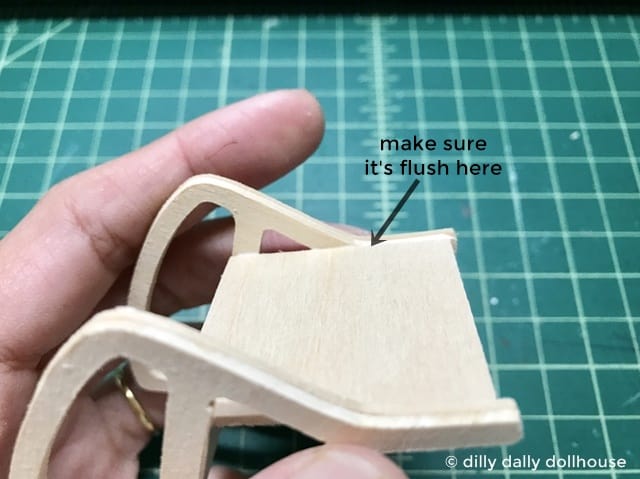
5. Attach the other chair side.
Again, make sure the seat and back are flush with the straight lines of the side.

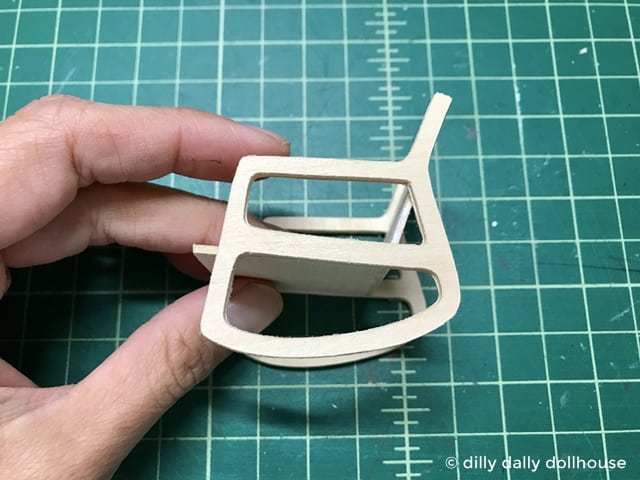
6. Secure the chair with clamps or rubber bands.
Set aside while you work on the cushions.

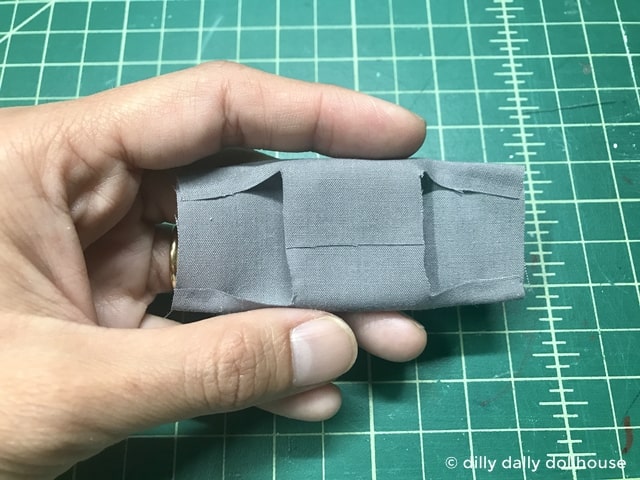
7. Prepare the chair cushions.
Stack the batting layers on top of the fabric, then glue to enclose.
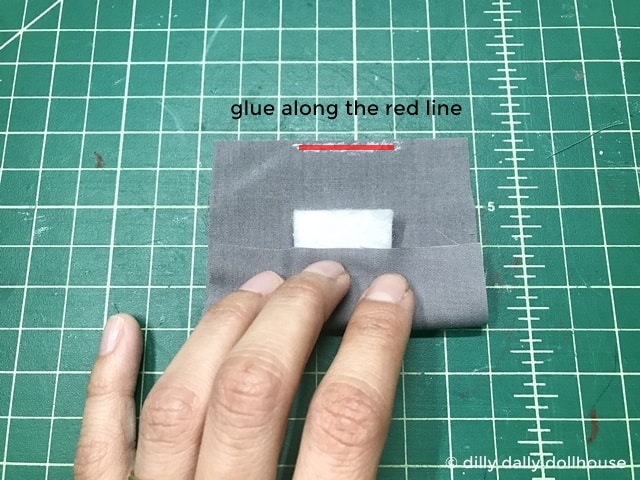
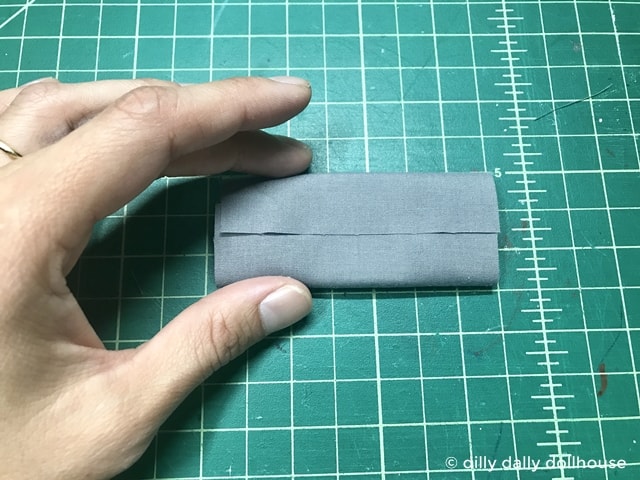
Snip off excess fabric.
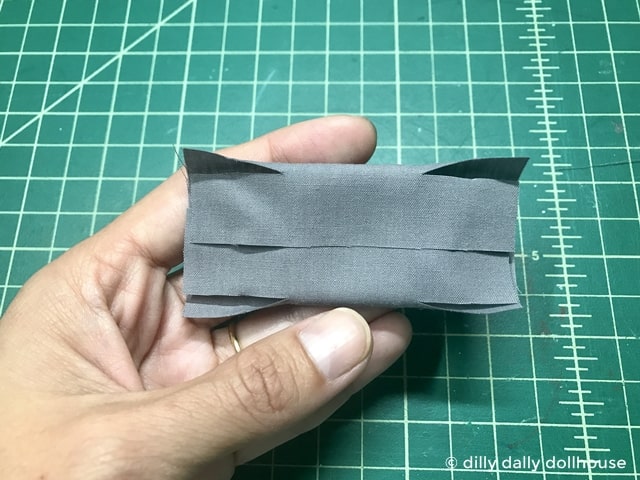

Glue the edges to fully enclose the batting and make a square-ish cushion.
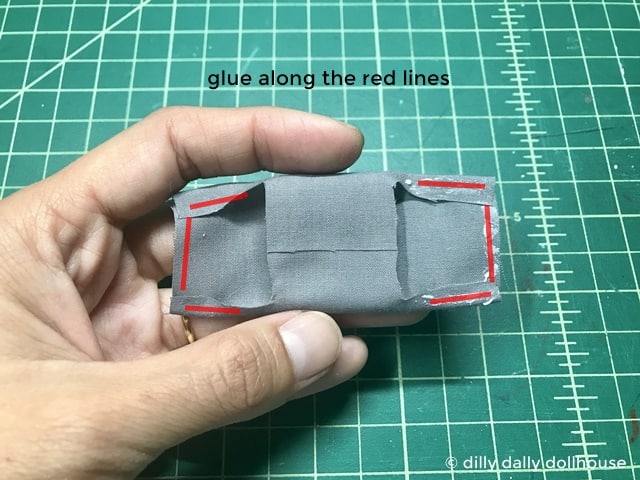
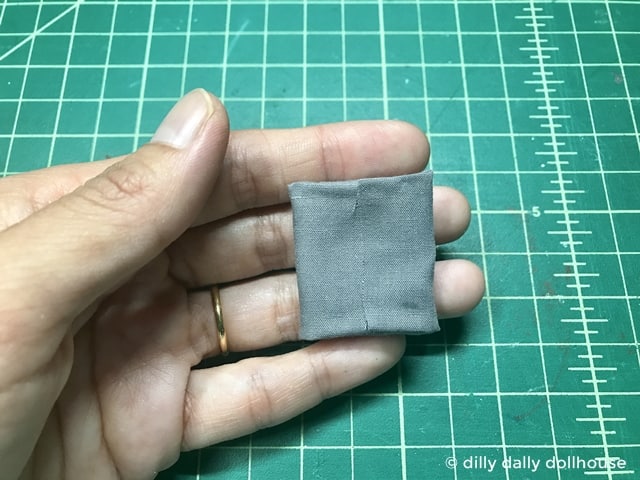
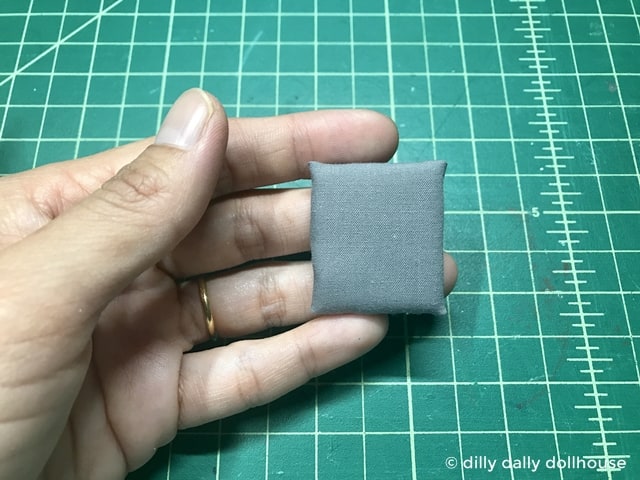
Do the same for the other cushion.
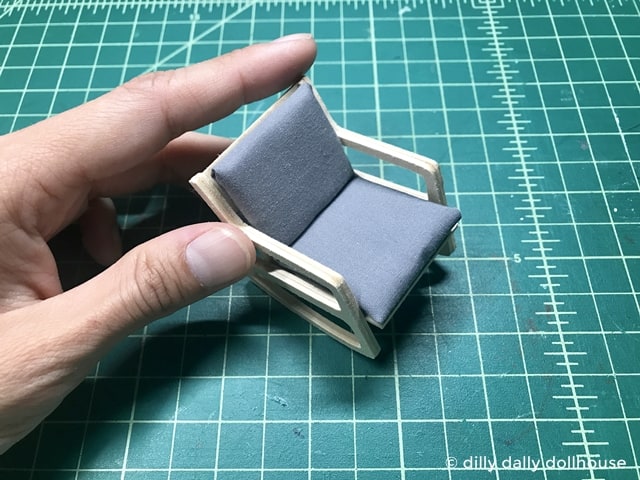
8. (Optional) Sand and paint and seal.
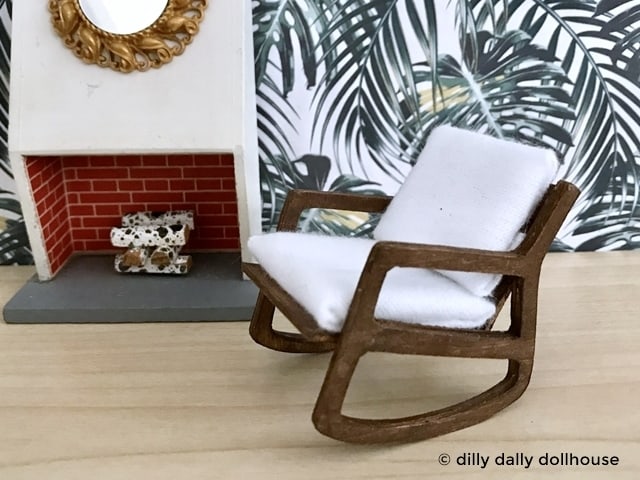
At the minimum you should sand the chair to remove the rough edges and glue residue. I stained one of my chairs here using walnut-tone gel stain, but I much prefer the light wood look.
Complete!

If you’re looking for other mid-century inspired mini furniture, check out the tutorials to make this wood case sofa and this slat coffee table.
Made your own? I’d love to know!
What motivates me the most is seeing you use my tutorials to make your own minis! There are many ways you can share your projects:
- comment below to let me know (or if you have any questions about it–for the benefit of others also!)
- link back to my site or this tutorial,
- tag me on Facebook or Instagram,
- share your version on my Facebook group!
The link for the 1:16 SVG file links to the 1:12 scale one. I didn’t know if you had an actual 1:16 scale SVG available.
Oops-my mistake! Yes, I do have the 1:16 available in the library https://www.dillydallydollhouse.com/resource-library.